
Service Automation – Creating Your Own Delegated Forms
The Identity & Access Management (IAM) solution from Tools4ever, HelloID, comes packed with various useful features and options that can save you time and boost efficiency. One standout example is the delegated forms from the HelloID Service Automation module. These forms allow you to standardise tasks and delegate them to third parties. This article offers more insights into configuring delegated forms and helps you get started with them.
What are Delegated forms?
If you work in a service or help desk, you're constantly seeking ways to make your work more efficient, thereby freeing up more time to provide optimal support to users. Delegated forms, a component of HelloID Service Automation, are an excellent tool for this purpose. These forms help you streamline numerous tasks and significantly increase automation. They also enable you to delegate responsibilities to colleagues from other departments, without them needing extensive rights or technical knowledge. We often refer to these colleagues as key users.

The tasks that you can execute (or delegate) via Delegated Forms are very diverse. These include resetting a colleague’s password, as well as changing a specific user’s group membership. Other examples are creating a new account, managing a Teams channel, or managing mailboxes in Exchange. If you want to learn more about Delegated Forms, also read our previous blog ‘’, where we delve deeper into Delegated Forms, the possibilities, and the benefits.
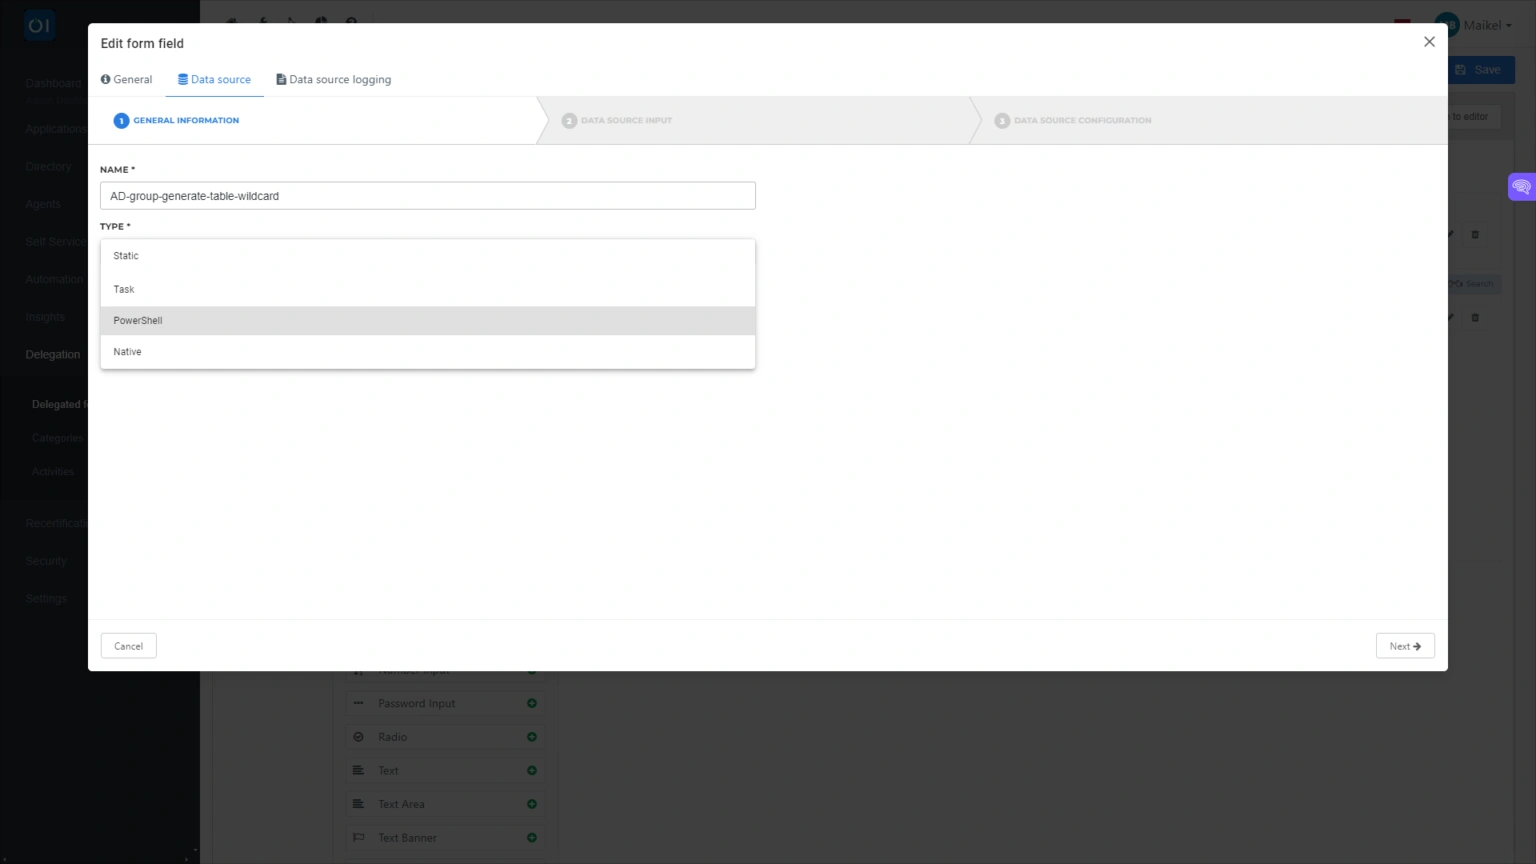
Setting up Delegated Forms
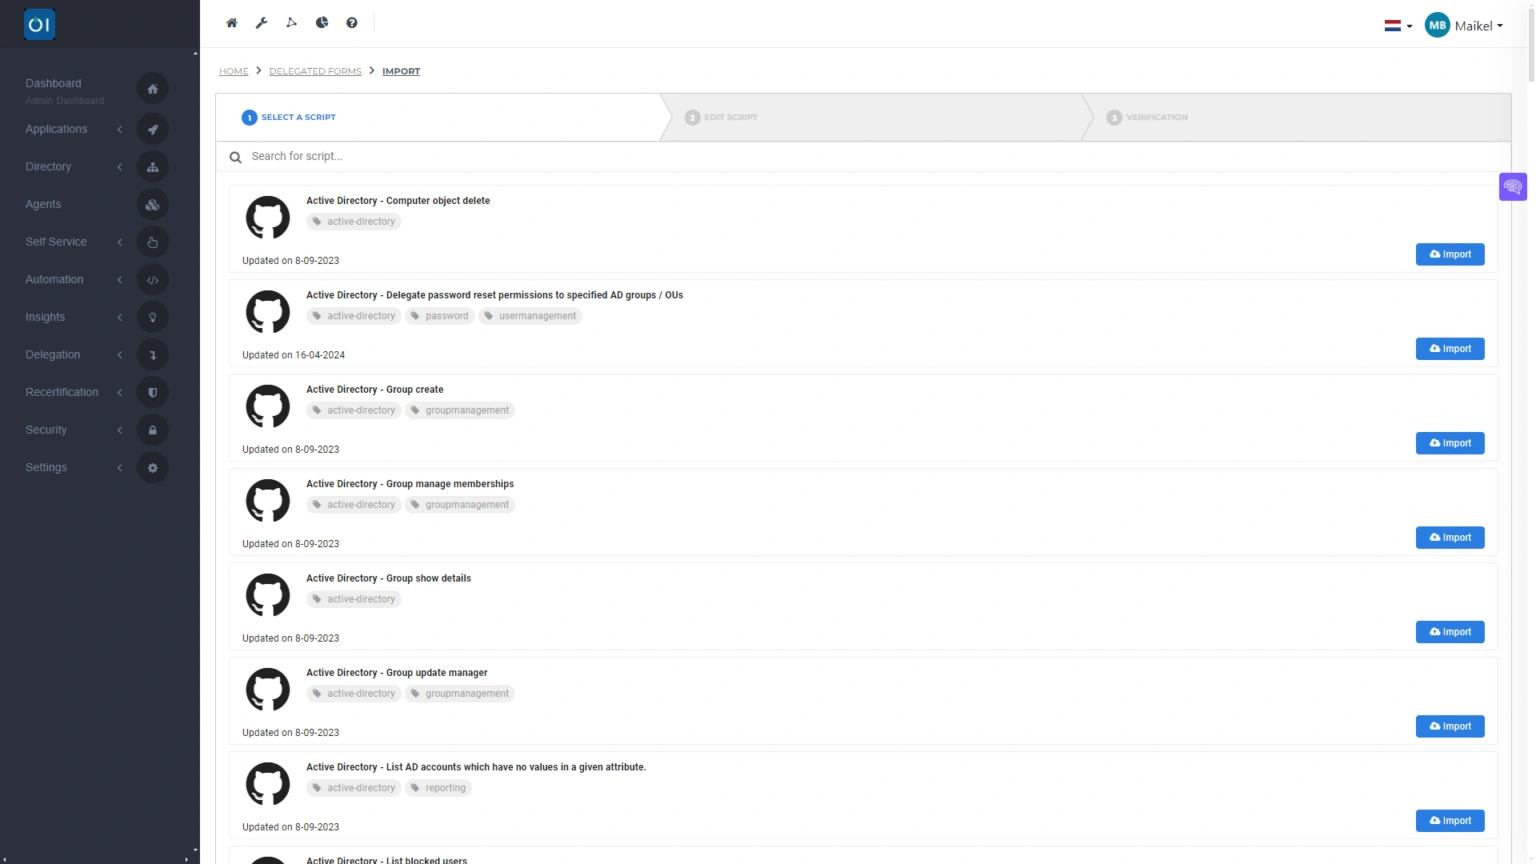
You have the option to import standard forms from GitHub and tailor them to your needs, or you can create your own forms from scratch. In either case, you take the reins. You decide which elements to include, how fields are displayed, and what actions are linked to each delegated form. Properly setting up forms ensures they deliver maximum added value. For example, you might aim to collect all necessary information upfront, avoid ambiguity in your questions, and, if necessary, immediately pass relevant data onto other forms.

The way you set up a form has a significant impact. A streamlined design ensures a smooth and efficient process, saving time. Therefore, you should carefully align a delegated form with the task it is meant to perform. This involves selecting the right elements and optimally configuring them.
Choosing the right elements
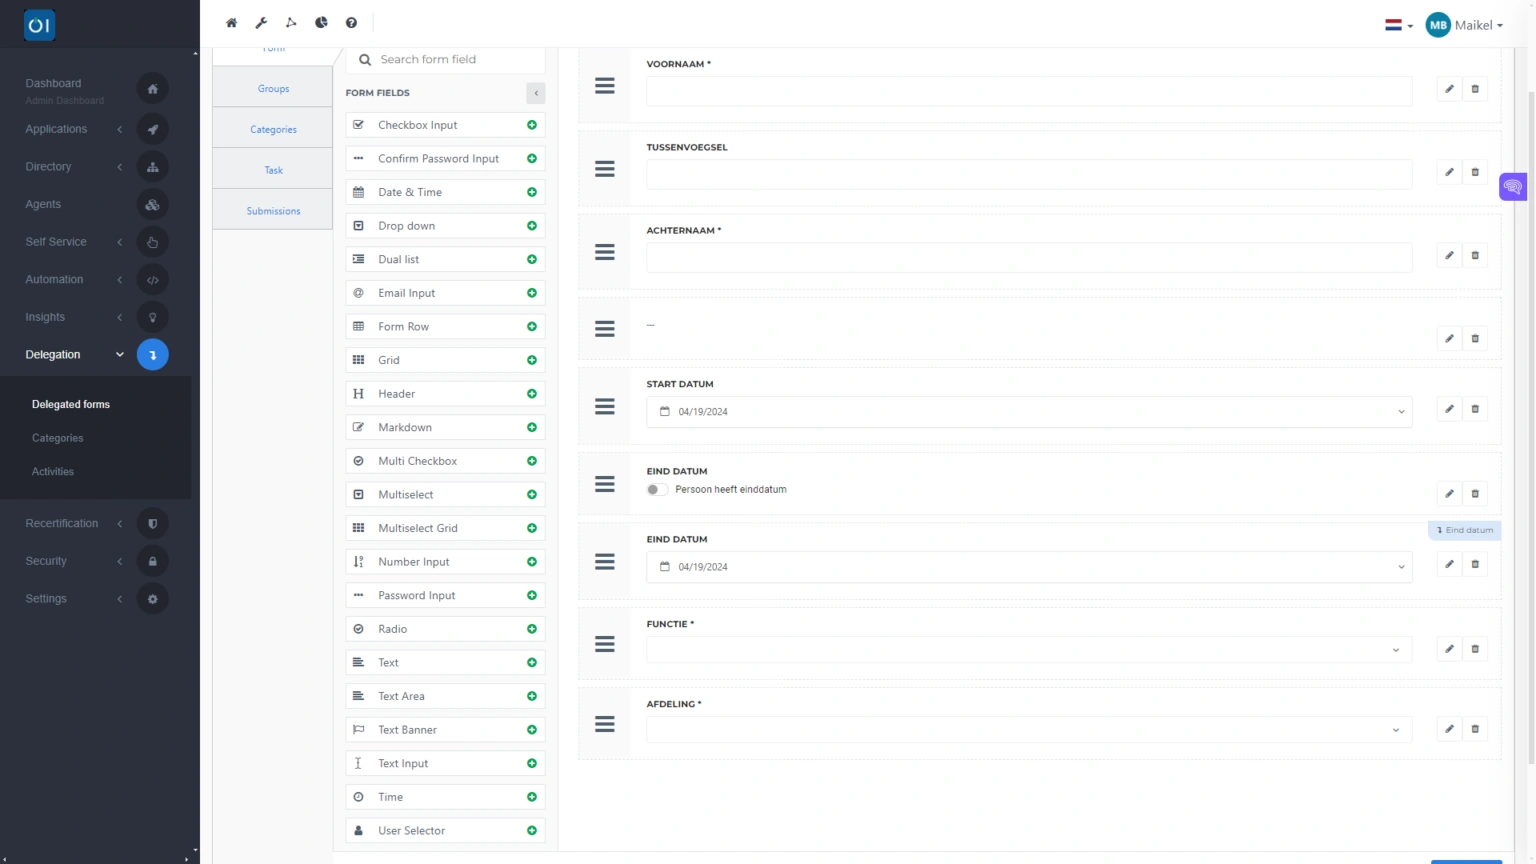
HelloID is here to assist. It offers over 20 different elements that you can use to gather a wide range of information. These include standard text input fields as well as protected fields for password entries. You can also incorporate various types of lists into your form. For instance, a dropdown list lets users choose from multiple options. If you want users to be able to make multiple selections at once, the ‘checkbox input’ allows them to mark all the options they desire. Another versatile feature is the ‘dual list’, which consists of two lists between which users can transfer items with the click of a button to make their desired selections.

You can add and arrange these elements by simply dragging and dropping them onto your form. You decide the sequence of the elements and can easily modify it as needed. Typically, HelloID displays elements in a vertical sequence, but with the 'row element', you can change this setup to display three elements side by side, for example. This is particularly useful if you need to display first name, middle name, and surname fields next to each other.
Configuring elements
Each element on a Delegated Form can be configured independently, giving you control over both the behaviour of the element and how it is displayed. For instance, you might set up a tooltip to assist users in identifying what data needs to be entered into a particular field.
Additionally, the visibility of certain fields can be made dependent on specific user inputs. This is especially useful for elements like the 'date picker', which allows users to input dates and times on a Delegated Form. You can configure this element to appear only under certain conditions, such as if the 'Account Expired' option is set to 'True', or if a user selects a specific checkbox on the form. You also have the flexibility to decide whether the date picker should collect both date and time or just the date.
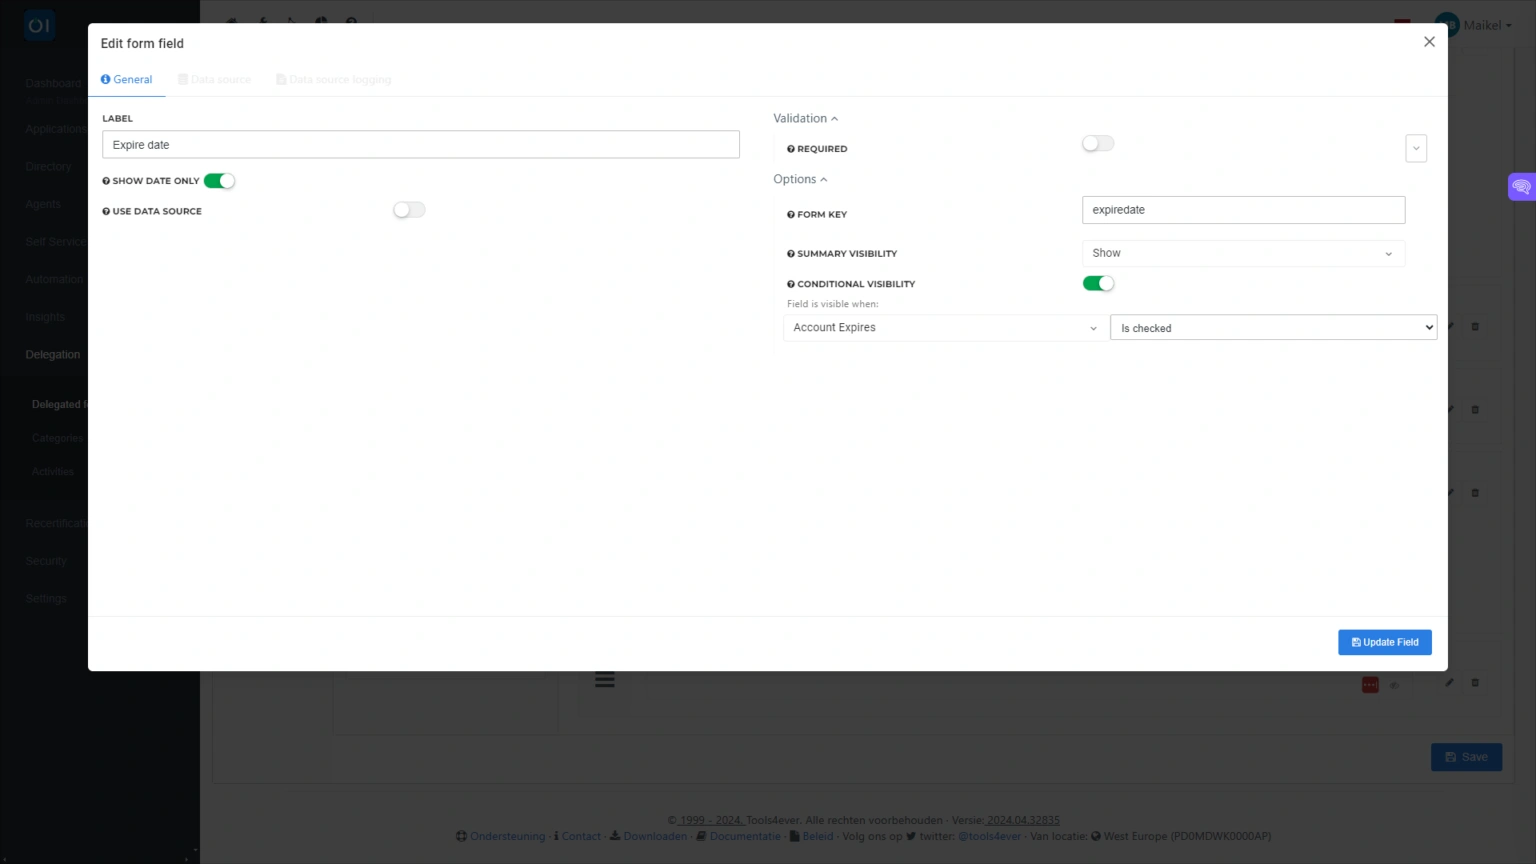
You can also make the display of a specific field dependent on certain inputs. This is particularly relevant for the 'date picker', an element that allows users on a Delegated Form to enter a date and time. In the configuration of this element, you can link the display of the date picker to certain conditions. For example, you might display the field only if the 'Account Expired' option is set to 'True', or show the field if the user checks a specific option on the form. Additionally, you decide in the configuration whether to include both date and time, or perhaps only a date.
Pre-filling data
In some instances, you may ask for information on a form that is the same for many users. In this case, you can pre-fill a value that will apply to most users. Only users for whom the value differs will need to adjust it.

The data you pre-fill can be loaded from various sources. HelloID supports four different types of data sources:
PowerShell data source: A data source based on a PowerShell script for generating data, for example from Active Directory. This data source enables data to be fetched in real-time.
Static data source: A static data source in which you can define a JSON object with specific choices that you make available to the end user. This option is particularly interesting if you are working with multiple forms containing the same element, and you want to configure this element in the same way across all forms.
Native data source: A native data source allows you to fetch data such as groups and users directly from HelloID itself.
Task-related data source: A data source based on a task in HelloID, available in the task catalogue. Note: this data source is no longer actively supported and performs less effectively compared to a PowerShell script. Therefore, where possible, opting for a PowerShell data source is advisable.
Retrieving user input with a unique key
In some instances, you may need to retrieve user input from a specific field, for example, if you wish to use this input on another form. This is facilitated by what's known as a key field, a unique key linked to a specific element of your form.
Are you utilising PowerShell or task-related data sources? If so, you can also assign variables to the input on a form. For example, you can use a data source to locate a user in Active Directory, where HelloID employs the input of the user as the search term. This capability enables the management and retrieval of group memberships through a Delegated Form.
Getting started
Delegated Forms provide a straightforward and streamlined way to execute and automate various tasks. Here's a quick run-through of the process: a service desk employee or key user opens a Delegated Form, which then loads with the elements you've configured. If necessary, HelloID can automatically populate certain data fields, requiring users only to verify this information. The user then fills in the form, and HelloID displays a summary of the data entered for verification. Once the input is confirmed as correct, the user submits the form. HelloID then automatically executes the actions that are linked to the form through a PowerShell script.
Interested in learning more about HelloID Service Automation? You can find more information here. If you have any questions, please contact us!

Written by:
Sjoerd van Dijk
Sjoerd van Dijk is al 7 jaar een toonaangevende IAM-expert bij Tools4ever. Met een technische achtergrond als fundament heeft Sjoerd zich ontwikkeld van technisch consultant tot trainer in HelloID. Zijn uitgebreide ervaring met het beheren van gebruikersaccounts motiveert hem om de beveiliging en efficiëntie via IAM continu naar een hoger niveau te tillen.